
This is my method for a full packer brisket — simple seasoning, smoked low and slow, wrapped Texas-crutch style in tallow and peach butcher paper once it hits the stall. Some of you diehard pitmasters will do it differently, and that’s fine. This is what works on my smoker.
Why the Flat Almost Always Comes Out Drier (And It’s Not You)
Here’s the thing nobody wants to say out loud: the point and the flat are basically two different cuts of meat fused together, and only one of them is easy to get right.
The point is loaded with fat running all through it. It can go a little past done, sit a little too long, get sliced a little wrong, and it’ll still taste juicy because it’s self-basting the whole time. That’s why almost every brisket video ends the same way — knife goes in at the point, camera zooms in on that glistening cross-section, everybody nods. It’s an easy shot because the point is forgiving.
The flat isn’t. It’s leaner, it’s thinner, and it cooks faster than the point sitting right next to it. By the time the point has rendered down to that fall-apart, jiggly finish, the thin end of the flat has often already blown past its window. There’s no fat reserve to bail it out if you’re a few degrees too far or a few minutes too long — it just dries out, and there’s no cross-section trick that hides it.
That’s the whole reason for half the extra steps below: positioning the flat away from direct heat, giving it a heat shield when it needs one, adding a water pan next to it, wrapping tight enough to trap moisture and keep it braising in its own fat once it’s crutched. None of that is optional fussiness — it’s the actual fix for the actual problem.
Tips for Texas-Crutch Smoked Brisket
I hate over-trimming a brisket — it feels like wasted meat. I trim down to about ¼” of fat over the flat and round out the thin, wispy edges and the thick fat deckle between the point and flat, and leave the rest alone.
If your brisket has a particularly thin flat, it’s fine to loosely tent that end with a piece of foil to act as a heat shield — just leave space between the foil and the meat so air can still move underneath it.
Butcher paper can be stiff and stubborn to wrap tightly, especially the first few times. If you’re worried about leaks or air pockets, don’t fight it — use a few large sheets of heavy-duty foil instead and crimp it as tight as you can around the meat until it’s fully sealed.
Every smoker runs a little differently, and every brisket is a different size. Go by the probe feel and the temperature window, not the clock — that’s what actually tells you it’s done, not how many hours have passed.
Don’t Overthink This
One more thing before you fire up the smoker: don’t overthink this. A lot of people avoid brisket entirely because they’re scared of screwing it up. Here’s the truth — you can hit every number right, follow every step exactly, and the meat still might not cooperate. That’s just brisket. Any pitmaster who tells you they’ve never had one turn out wrong is lying to you.
Trim it, season it, watch your temps, go by feel more than the clock, and give it a shot. Worst case, you learn something for next time — and even an “off” brisket is still pretty good barbecue.
Sauce It Up
This brisket doesn’t need a sauce, but it’s not against one either. If you want to dress up a few slices, any of these three go well with it: Honey Chipotle BBQ Sauce for something sweet and smoky, North Carolina Style BBQ Sauce for a vinegar-forward kick, or South Carolina Gold BBQ Sauce if you want to go the mustard route.
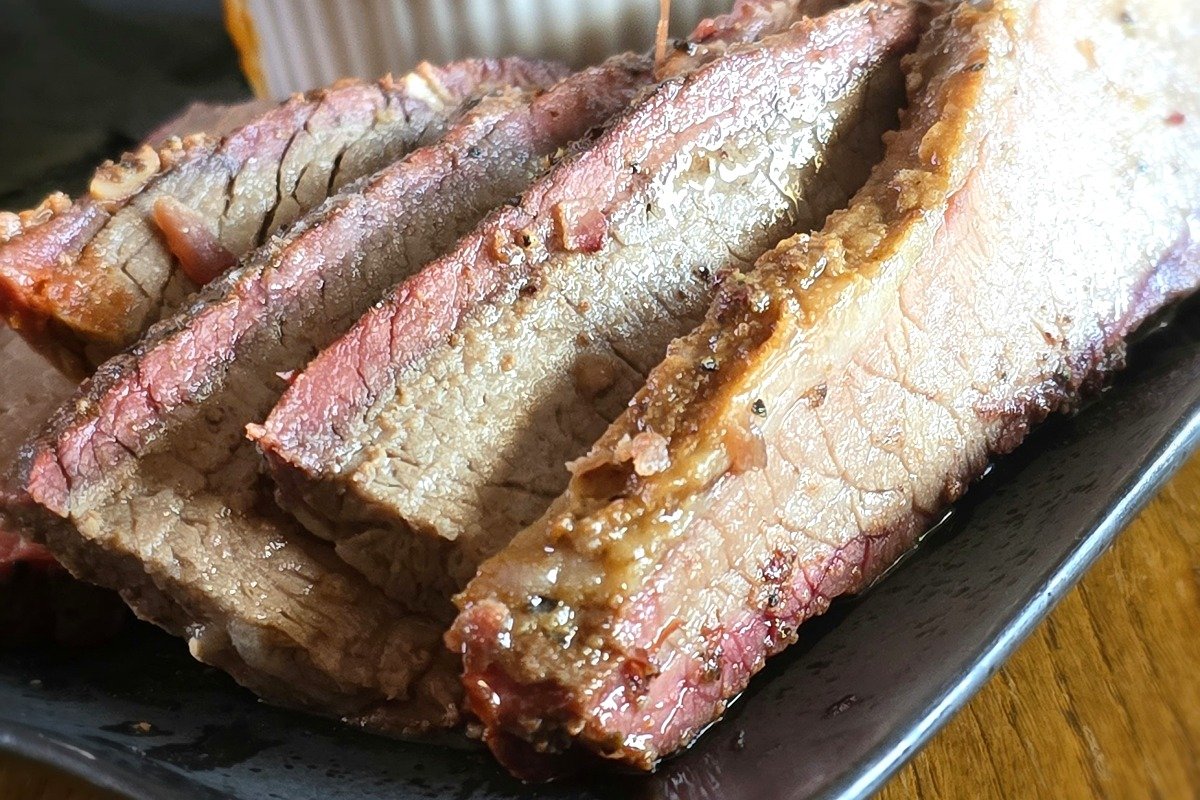
Texas-Crutch Style Smoked Brisket
Ingredients
Equipment
Method
- Trim the brisket down to about ¼” of fat over the flat. Round out the thin, wispy edges and trim down the thick fat deckle where the point and flat meet. Here’s a good trimming video if you want to see it done. Save the trimmings — they’re good for making tallow.
- Pat the brisket dry with paper towels.
- Coat the whole brisket in a thin layer of yellow mustard.
- Season generously on all sides — including the nooks and crannies — with coarse salt and coarse black pepper. When it looks like too much, it’s usually about right.
- Preheat the smoker to 225°F.
- Place the brisket fat side down, point toward the hottest part of the grill and flat facing away from it.
- Fill a disposable loaf pan with about 2 inches of water and set it on the grates next to the flat. It acts as a heat sink and keeps a more humid environment around the leaner side of the brisket while the fattier point renders.
- Insert one probe into the thickest part of the point and one into the center of the flat.
- Smoke until the flat probe reads 150–160°F (the stall).
- While it smokes, lay out a sheet of butcher paper or foil about three times the length of the brisket — long enough to wrap it lengthwise twice.
- Spread half the tallow over the paper.
- Once the flat hits 150–160°F, pull the brisket and set it fat side down on the tallow. Spread the rest of the tallow on top, then wrap tightly, pressing out any air pockets and sealing every seam so no steam or fat can escape.
- Return the wrapped brisket to the smoker.
- Keep smoking until the flat probe reads 200–203°F. Start checking for probe-tenderness around 190°F — you want the probe to slide in like it’s going through soft butter, with no real resistance. Check every 30 minutes or so once you’re in that window.
- It’s fine to creep a little past 203°F if it needs it, but pull it once it hits about 208°F either way.
- Pull the brisket and open the wrap for about 20 minutes to let it “burp” — this lets the built-up steam escape so the bark doesn’t turn soggy.
- Re-wrap it, then rest it in a cooler lined with an insulated bag or towels for at least 2 hours. This isn’t just a warming step — it’s carryover cooking and moisture redistribution, and it matters more for the flat than the point since the flat has less fat to fall back on if you skip it.
- Separate the point from the flat by cutting along the seam of fat that runs between them.
- The two pieces don’t run the same direction. Slice each one against its own grain — for the flat that’s usually straight across from one long edge to the other; for the point you’ll often need to turn the piece 90 degrees partway through to keep cutting against the grain there too. Slicing with the grain instead of against it is one of the easiest ways to make a perfectly cooked brisket taste tougher and drier than it actually is.
Leave a Reply